Marking Up a Document
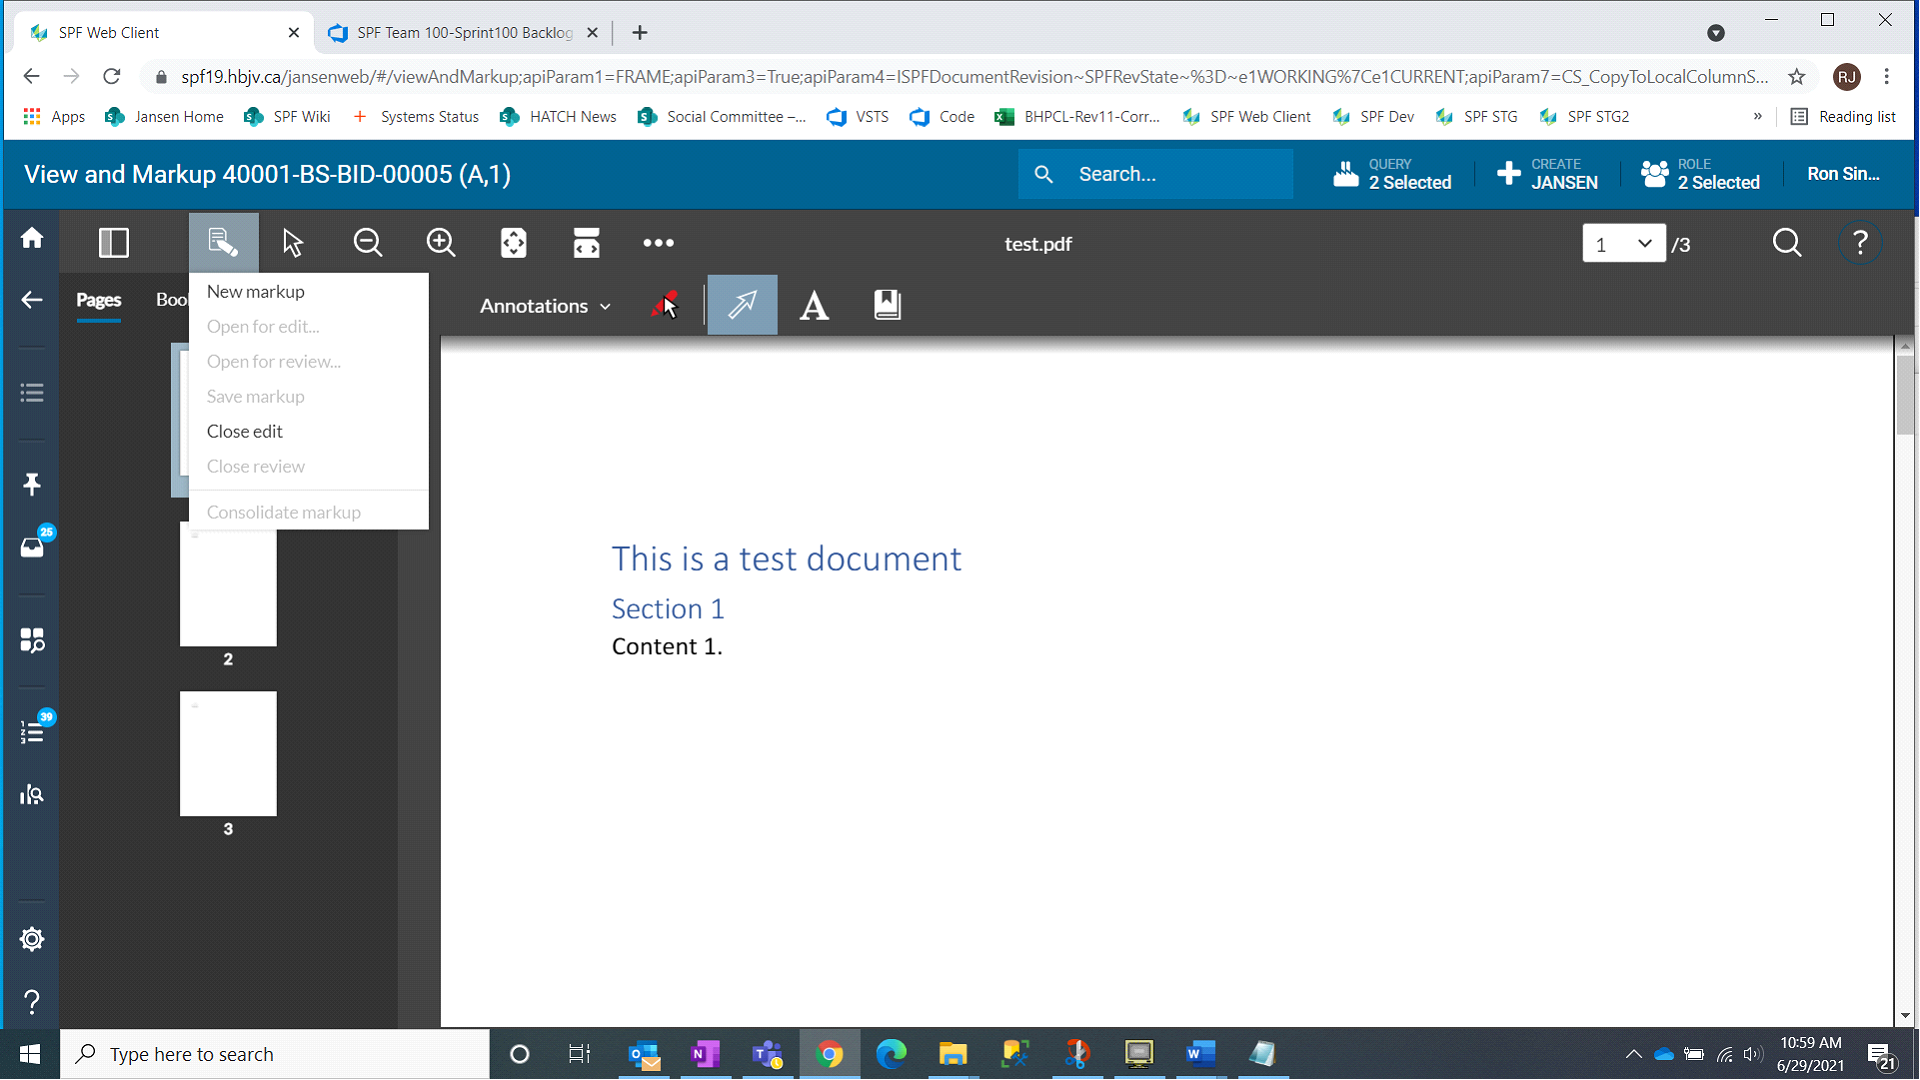
1. Click the Markup menu
2. Select New Markup

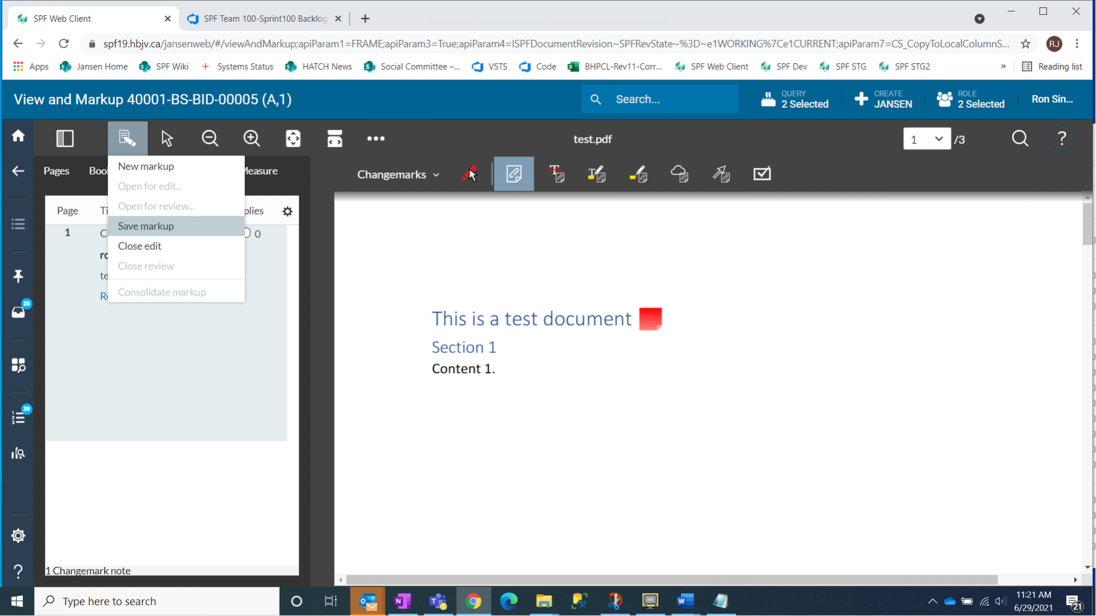
3. Ensure the submenu is set to Changemarks.

The following Changemark tools (from left to right) are available and must be used:
-
Changemark - essentially a sticky note.
-
Changemark Text Strikethrough - draws a strikethrough line through text.
-
Changemark Text Highlight - highlights selected text.
-
Changemark Highlight - highlights an area.
-
Changemark Cloud - draws a cloud around an area.
-
Changemark Arrow - draws an arrow.
-
Checkview - draws a checkview box.
4. Apply markups by selecting the desired mark and clicking in within the document at the desired location. Note that you can resize elements as you add them to the document. The colour of changemarks can be changed by hovering over the changemark after it has been placed.
5. The Select tool allows you to choose a changemark so that it can be modified.

6. Assign a name to your note.
-
A default name is generated for your changemark note: Changemark note #xx where xx is a sequential number.
-
It's recommended you assign a descriptive name to your changemark note that includes your discipline and your initials or name. e.g. EL-JS where EL = Electrical, JS = Person's initials
7. Type your comment (Changemark Note) in the Create Changemark note box.

8. Classify your comment: From the dropdown lists, assign a type to the comment. This is optional information, but it is a "nice-to-have".
9. Select OK.
10. Changemark view pane
-
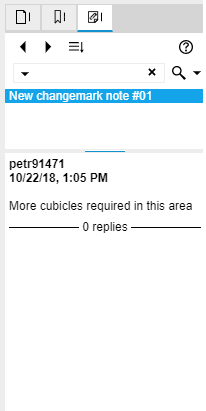
Your comment will now be visible in the changemark view pane on the right hand side of the screen.
-
Other reviewers and consolidators will see all changemarks.
-
By selecting Add Reply at the bottom of the Changemark view pane, all dialogue for a comment will be captured against the changemark.

11. Periodically save your work by choosing the Save Markup option from the Markup menu; you will notice that there is a naming convention for markups, this is now more apparent.

12. Be sure to specify the correct type for your layer:
a. Document Review for a review
b. Consolidation for consolidations
Note that external parties can only see the Consolidation layers and their own Review layers within View and Markup.

Note the asterisk beside the Name property. This denotes that the property is mandatory but is greyed out because it will be completed by the system. You are not required to specify your initials; this is part of the naming convention for the markup layer and will be auto completed when clicking on Finish. In general, the components of the Name are now shown in SPF where it was previously displayed as “TBD”.