-
This page describes how to create a new tag creation job. -
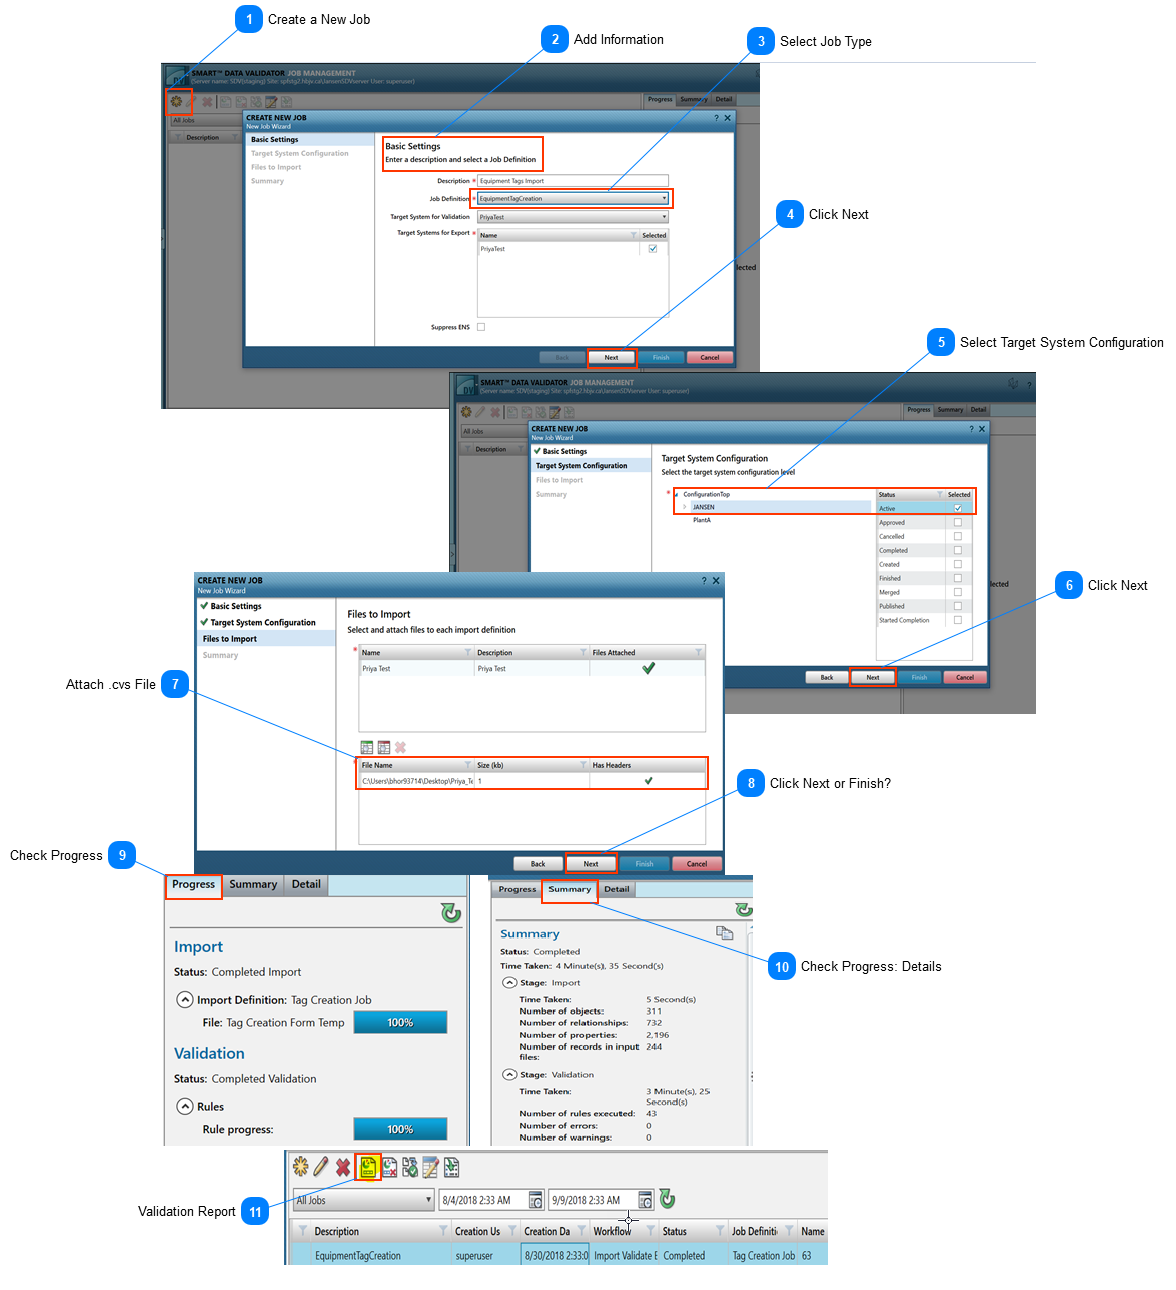
The information listed here is based on the assumption that you have accessed the SDV Desktop Client. Refer to Open SDV Desktop Client. Create a New JobClick the icon to create a new job.
|
 Add InformationIn the new window, complete the required Basic Settings fields.
Note: Make sure the Suppress ENS checkbox under the information fields is unchecked if the ENS of the new or updated tags needs to be configured in SPF.
|
 Select Job TypeSelect the job type from the dropdown menu. For more information about job definition, see Table 1. SDV Configurations under Modifying Information in Bulk. |
 Click NextWhen you complete the required information, click Next.
|
 Select Target System ConfigurationIn the next tab, Target System Configuration, select the appropriate status.
|
 Click NextClick Next.
|
 Attach .cvs FileAttach the .csv file containing the tags to be imported.
|
 Click Next or Finish?Click Next.
|
 Check ProgressIn the next pop-up window, you can monitor the import progress.
|
 Check Progress: DetailsUnder the Summary tab, you can find more details about the import.
|
 Validation ReportOnce the validation is complete, you can download a validation report.
|
|
 Select the job type from the dropdown menu. For more information about job definition, see Table 1. SDV Configurations under Modifying Information in Bulk.