Attach / Replace Files
-
This page contains information on how to attach a new file to a document, or to replace an existing file on a document.
-
This page assumes you have searched for and located the relevant document in SPF. Refer to Search for Documents.
|
Note: When a document container is first created, its Document Status is set to Placeholder by default. After attaching file(s) for the first time to a document container, you may want to update the document's status. Refer to Change Document Status.
|
1. Verify document state
-
Verify document icon is blue.
-
This indicates the document is in a working state and a new version of that revision can be created. I the document icon is green, revise the document to the next revision and then proceed.
2. Open Actions menu
-
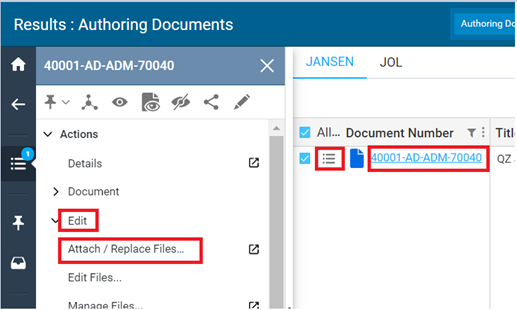
Select the Actions menu button, located left of the Doc. Number.
-
The Actions menu opens on the left side of screen.
3. Select > Files
4. Select Attach/Replace files
-
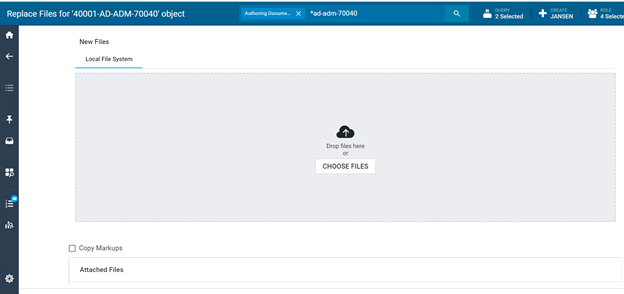
The Replace Files window opens. This window allows you to attach New Files and/or replace Attached Files.
-
A list of attached files is displayed in the Attached Files box.
 5. In the New Files box, select the COOSE FILES button. A new window will open.
 -
Use the browse window to select files you want to attach or replace.
-
Each time you select a file, it appears in the Queue.
-
A file highlighted with yellow background indicates the file will replace an existing attached file.
-
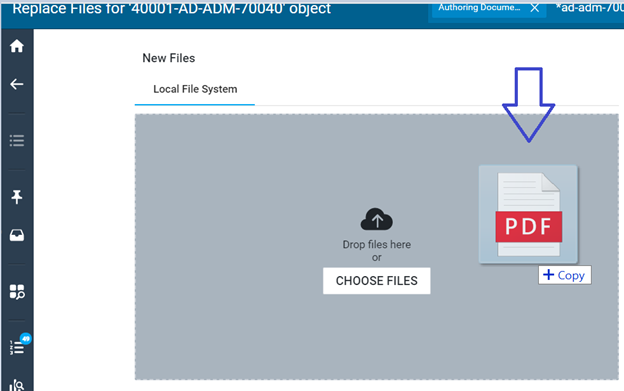
You can drag and drop files to the Local File System box.


-
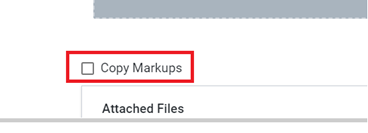
You can also opt to Copy forward the markups of any files being replaced by selecting Copy Markups:
